
26 Jul What are leather studs and how do you choose the right ones?
If you’ve ever run your fingers across a leather jacket studded with gleaming metal accents and thought, “I need to know everything about this”, you’re in the right place. Leather studs are one of the most versatile, durable, and visually striking hardware elements in fashion, craft, and upholstery. Whether you’re a DIY enthusiast, a leather artisan, or a designer looking to level up a project, understanding leather studs from the ground up will transform the way you work with them.
What are leather studs?
Leather studs are small metal fasteners pressed or sewn into leather to add decorative texture, reinforcement, or edge detail. They come in post-back, prong, and screw-back styles, and are made from materials like brass, zinc alloy, or stainless steel. Used across fashion, upholstery, and leathercraft, they combine function with bold aesthetic impact.
What Are Leather Studs and Why Do They Matter?
Leather studs are small but mighty hardware pieces that serve a dual purpose: they reinforce leather goods while adding a raw, edgy, or sophisticated visual element. They’ve appeared on everything from punk rock jackets to luxury handbags, motorcycle gear to high-end furniture.
Beyond aesthetics, studs protect leather edges from fraying and wear. In functional applications, they act as reinforcement points that distribute stress across the material, preventing tearing at high-tension zones like belt loops, bag handles, and seams.
The craftsmanship behind a well-studded leather piece is genuinely impressive. Placement, spacing, and stud type all affect both the look and the longevity of the finished product.
The Different Types of Leather Studs You Should Know
Not all leather studs are created equal. The type you choose affects installation method, final appearance, and durability. Here’s a breakdown of the most common varieties:
1. Prong-Back Studs
These are the most beginner-friendly. Prong-back studs have small metal tines that you push through the leather and then fold flat against the back. No special tools required, just a flat surface and some pressure.
They’re ideal for soft to medium-weight leathers and are commonly used in wristbands, chokers, and decorative panels. The tradeoff? Prongs can occasionally loosen over time with heavy use.
2. Screw-Back Studs
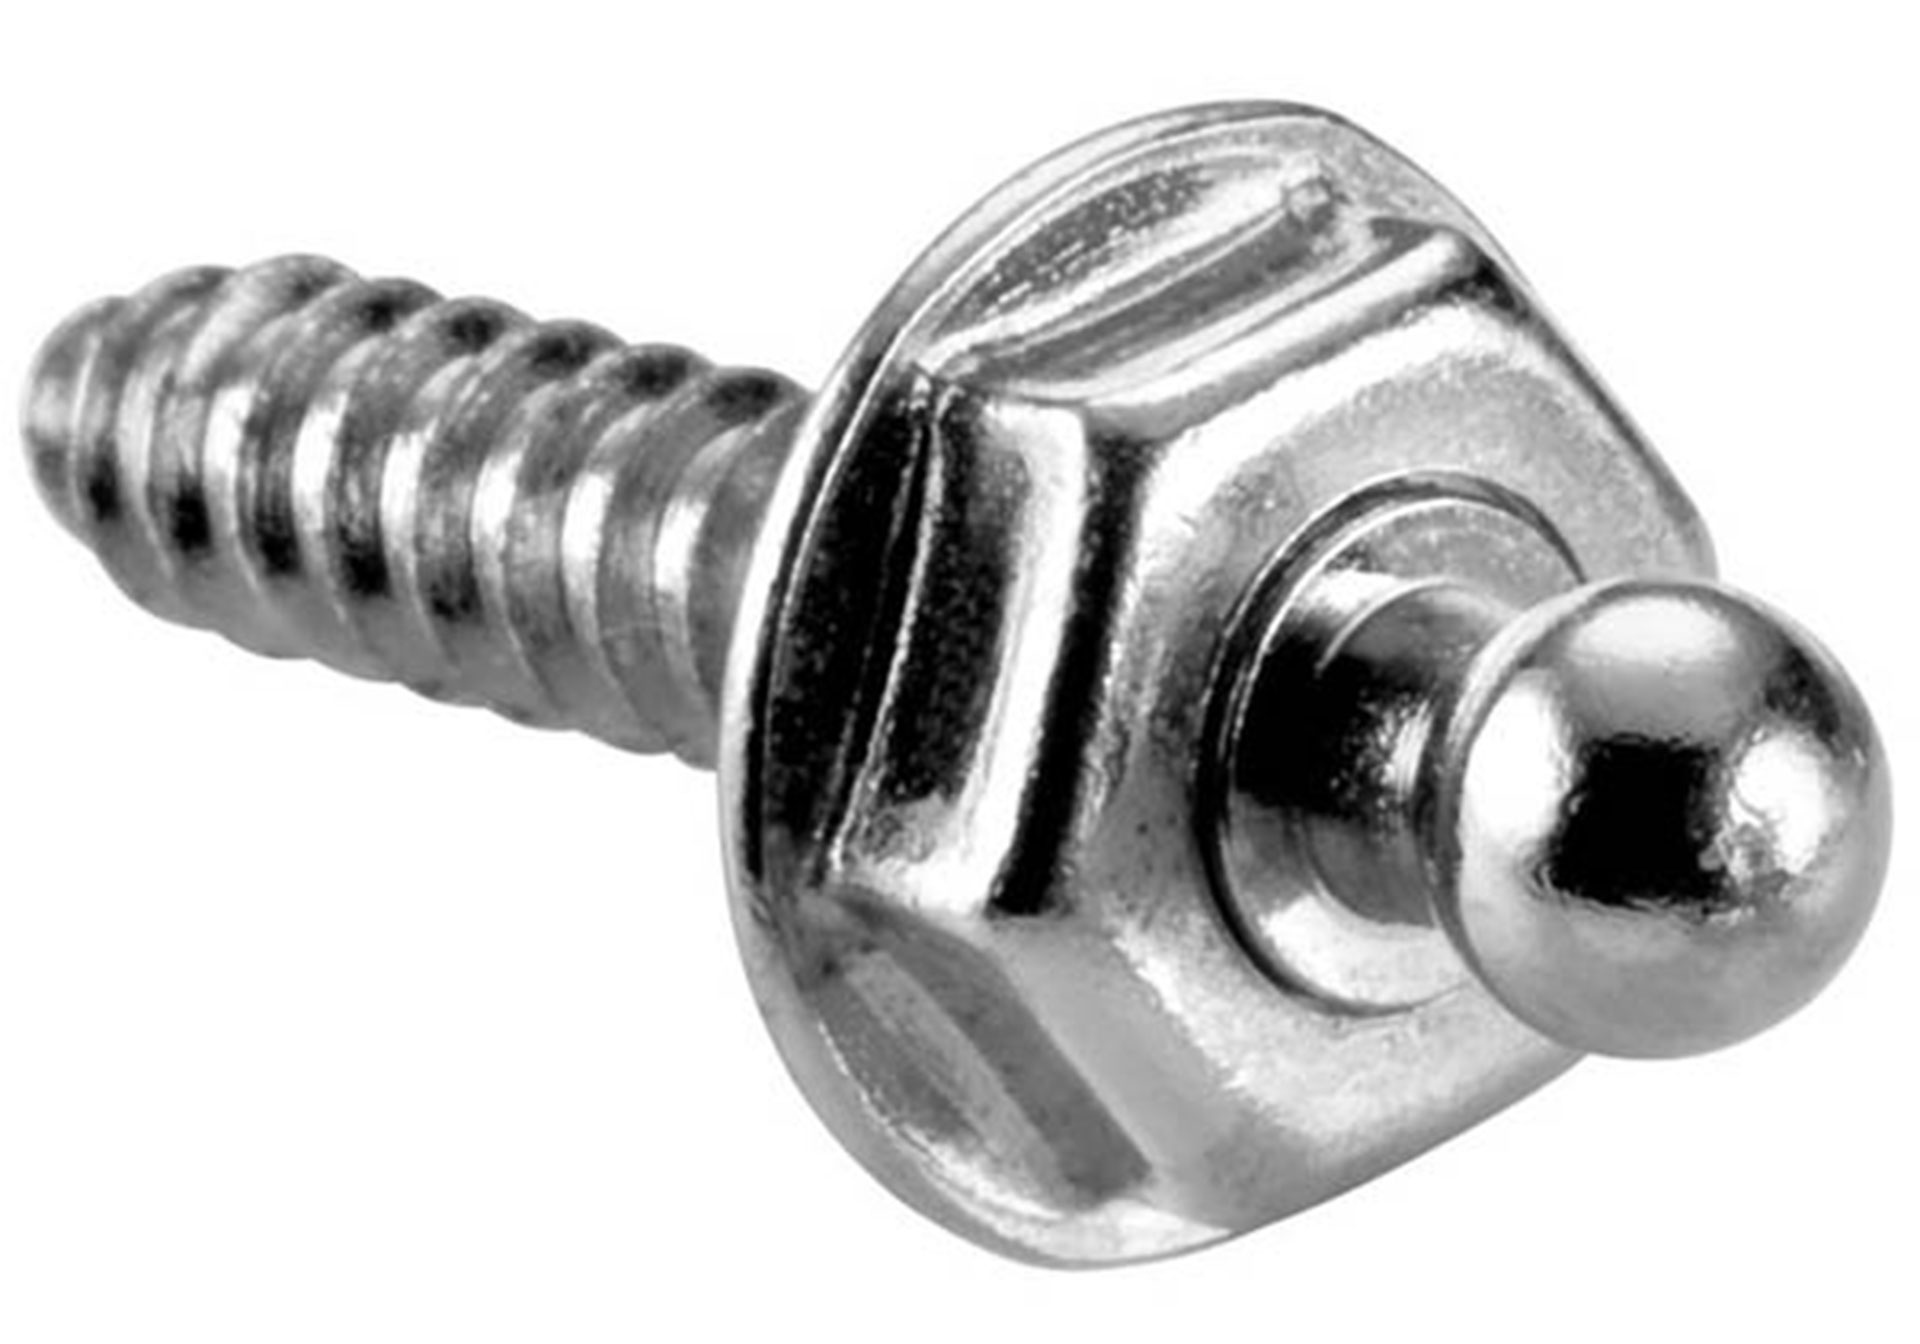
Screw-back studs consist of two pieces: a decorative front cap and a threaded post that screws into a backing plate. They create an incredibly secure, professional-looking finish and are the go-to choice for high-stress applications.
If you’re working on motorcycle gear, heavy-duty belts, or furniture, screw-back studs are your best friends. Their reliability is partly due to the same principles behind solid fastener screw types used across industrial and craft applications; thread engagement and material compatibility matter enormously.
3. Rivet-Style Studs
Rivet studs combine the function of a rivet with a decorative face. They’re set using a hammer and anvil tool, creating a permanent, tamper-proof bond with the leather. These are ideal when a clean, flat finish is needed on both sides.
4. Pyramid Studs
With their sharp angular geometry, pyramid studs are a favorite in punk, goth, and streetwear aesthetics. They typically come in prong-back format and create a uniform, grid-like pattern that’s visually commanding.
5. Dome Studs
Dome studs offer a softer, more rounded profile that reads as elegant rather than aggressive. They’re widely used in luxury handbag hardware, equestrian gear, and upholstery detailing. Think polished brass or antique bronze finishes on a deep tan leather, striking.
6. Spike Studs
Spike studs project outward from the leather surface, creating a three-dimensional, textural statement. They’re popular in alternative fashion accessories and costume work. Always consider wearability, outward-facing spikes on a garment need careful placement to avoid skin contact.
Prong-Back
Easy to install, no tools needed. Great for soft leather projects and beginners.
Screw-Back
Maximum security and a pro finish. Perfect for heavy-duty leather applications.
Rivet-Style
Permanent and tamper-proof. Ideal when a clean double-sided look is required.
Pyramid / Dome
Decorative options with distinct personalities, edgy vs. elegant.
Materials and Finishes: What Your Studs Are Actually Made Of
The material your leather studs are made from directly affects their durability, appearance, and compatibility with different types of leather. Here are the most common options:
- Brass: Classic, corrosion-resistant, and develops a beautiful patina over time. A favorite for vintage and artisan leatherwork.
- Zinc alloy: Affordable and highly versatile, available in a huge range of finishes. Slightly less durable than solid brass but excellent for fashion applications.
- Stainless steel: The most durable option, ideal for outdoor and heavy-use applications. Resists rust and moisture exceptionally well.
- Iron (nickel or antique plated): Common in budget-friendly stud packs. Prone to rust if the plating chips, so best reserved for dry, low-impact applications.
- Aluminum: Lightweight and rust-proof. Used in applications where weight matters, like cosplay and costume armor.
Finish choices include polished silver, antique gold, gunmetal, rose gold, matte black, and oil-rubbed bronze. Matching your finish to your leather’s undertones creates a cohesive, intentional look.
How to Apply Leather Studs: A Step-by-Step Guide
Installing leather studs is a satisfying process once you understand the basics. Here’s a practical walkthrough applicable to most stud types:
Tools You’ll Need
- Hole punch or awl
- Mallet or hammer
- Anvil or steel block
- Setter tool (for rivet-style studs)
- Ruler and chalk or silver pen for marking
- Cutting mat or leather scrap to protect your work surface
Step-by-Step Installation
- Plan your layout. Sketch or mark your stud placement with chalk before committing. Use a ruler for uniform spacing. A good trick: cut a cardboard template with evenly spaced holes to use as a guide.
- Punch your holes. Use a hole punch sized to match your stud posts. A clean hole is critical; ragged edges cause studs to sit unevenly and can tear under tension.
- Insert the stud. Push the post through from the front of the leather. For prong-back studs, this is your installation point. For screw-backs, thread on the backing plate at this stage.
- Secure the backing. For prong studs: fold the prongs flat using a setter tool or the flat head of an awl. For screw-backs: tighten with your fingers or a small flathead screwdriver. For rivet studs: place over the anvil and strike the setter with a mallet.
- Inspect and adjust. Check that each stud sits flush and secure. Loose prongs can be re-pressed; over-tightened screw backs can strip, work methodically.
Pro Tip:
When working with thin or delicate leathers, place a small piece of leather backing or a washer behind each stud. This distributes the load and prevents the stud from tearing through the material over time, especially important on bags and accessories that bear weight.
Leather Studs in Fashion: From Subculture to High Street
The cultural history of leather studs is as rich as the material itself. Studs first gained mainstream notoriety in the 1970s punk movement, where artists like the Sex Pistols and Siouxsie Sioux turned studded leather into a visual symbol of rebellion and self-expression.
By the 1980s, heavy metal and rock culture adopted studs as part of a larger leather-and-denim aesthetic. Studded jackets, belts, and wristbands became uniform for fans and performers alike.
Fast-forward to today, and leather studs appear at every level of the fashion industry. Alexander McQueen, Valentino, and Versace have all featured studded leather pieces in major runway collections. Meanwhile, independent designers and DIY crafters use studs to personalize everything from sneakers to tote bags.
The stud has transcended its rebellious roots to become a genuine design element, one that communicates everything from raw edge to refined luxury, depending on execution.
Creative Ways to Use Leather Studs in Your Projects
If you’re looking for inspiration, here are some genuinely exciting ways to incorporate leather studs into both fashion and functional projects:
- Jacket back panels: Create a full graphic using studs, skulls, geometric patterns, lettering, or abstract shapes. Map it on paper first, then transfer to leather.
- Belt customization: Add a single row of pyramid studs along a plain belt for an instant style upgrade. Space them evenly using a pre-punched leather strip as your guide.
- Bag hardware accents: Replace plain rivets on a tote or crossbody bag with dome or pyramid studs to add visual interest along seams and corners.
- Upholstered furniture: Vintage-style leather chairs and ottomans use rows of dome studs along the edges, this is called nailhead trim and it’s a timeless interior design technique.
- Shoe and boot detailing: Stud the toe box or heel counter of leather boots for a custom, one-of-a-kind look. Use screw-back studs here for maximum durability.
- Phone cases and wallets: Small pyramid or round studs can transform a plain leather phone case into something completely unique.
Choosing the Right Leather for Studded Projects
Not every leather is suited to every type of stud application. Matching leather weight and stud type is crucial to a successful result.
Leather Weight Guide for Studs
- Lightweight leather (0.5–1.5mm): Best with small prong-back studs. Always use backing material to prevent tearing. Suitable for wristbands, chokers, and thin accessories.
- Medium-weight leather (1.5–3mm): The sweet spot for most stud types. Works with prong-back, rivet, and screw-back styles without reinforcement in most cases.
- Heavy-weight leather (3mm+): Use screw-back or rivet studs. Prong studs struggle to penetrate cleanly and may not fold properly through the extra thickness.
Vegetable-tanned leather is especially popular for studded work because it holds its shape and punches cleanly. Chrome-tanned leather is softer and more pliable, which is great for garments but may require backing reinforcement for heavily studded designs.
Common Mistakes to Avoid When Working With Leather Studs
Even experienced leatherworkers make these errors. Avoiding them will save you time, materials, and frustration:
- Using the wrong hole punch size. A hole that’s too large causes the stud to spin and sit loosely. A hole that’s too small splits the leather when the post is pushed through.
- Ignoring leather stretch. Soft leathers can distort under repeated stud installation. Work from the center outward to maintain even spacing.
- Mixing incompatible metals. Combining different metal types (like brass and steel) on the same project can cause galvanic corrosion over time, particularly in humid environments.
- Skipping layout planning. Eyeballing stud placement almost always results in uneven rows or asymmetrical patterns. Always measure and mark first.
- Over-tightening screw backs. This strips the threading and makes the stud impossible to remove or tighten later. Hand-tight plus a quarter turn is usually sufficient.
Where to Buy Quality Leather Studs
Quality matters when sourcing leather studs. Cheap zinc alloy studs with thin plating will tarnish, crack, or corrode within months. Here’s where to look for reliable options:
- Specialty leathercraft suppliers: Tandy Leather, Rocky Mountain Leather, and similar dedicated leatherwork suppliers stock professional-grade studs with accurate specifications.
- Hardware and fastener retailers: For large-quantity orders or industrial applications, hardware fastener suppliers often carry bulk stud options at competitive prices.
- Online marketplaces: Etsy sellers and platforms like AliExpress offer an enormous variety of decorative studs, but always check material specifications and reviews carefully before purchasing in bulk.
- Fashion trim suppliers: These specialize in garment hardware and often carry the most current finishes and shapes, including seasonal trend colors.
When evaluating quality, look for studs with consistent plating thickness, smooth post edges (rough edges can tear leather during installation), and a secure fit between post and backing plate.
Caring for Studded Leather Goods
Once your leather stud project is complete, proper care extends the life of both the leather and the metal hardware significantly.
- Clean studs gently. Use a soft, dry cloth to remove surface dust. For tarnished brass or bronze studs, a tiny amount of metal polish on a cotton swab works wonders; just avoid getting polish on the leather itself.
- Condition the leather regularly. Leather conditioner keeps the material supple and prevents cracking around stud holes, where stress concentrates. Apply with a soft cloth every few months.
- Store properly. Keep studded leather goods away from prolonged humidity and direct sunlight. Moisture accelerates metal oxidation, while UV light fades leather finishes and weakens fibers.
- Check stud security periodically. Prong-back studs especially can loosen with wear. Press them back down with a setter tool at the first sign of movement, before they fall out entirely.
Frequently Asked Questions About Leather Studs
What is the difference between a leather stud and a rivet?
A rivet is primarily a structural fastener used to permanently join two pieces of material, with a functional cap on both sides. A leather stud is primarily decorative, applied to one surface with a backing that secures it in place. Many products blur the line between the two.
Can leather studs rust?
Yes, depending on the material. Iron-based studs with worn plating are highly prone to rust. Stainless steel and solid brass studs offer much better corrosion resistance. Always store studded leather goods in dry conditions and inspect hardware regularly.
How do I remove a leather stud without damaging the leather?
For prong-back studs, carefully straighten the prongs using a thin flathead screwdriver or awl, then push the post back through the hole. For screw-backs, simply unscrew the backing plate. Rivet-style studs are permanent and typically require grinding or drilling to remove, which may leave a visible hole.
Sorry, the comment form is closed at this time.